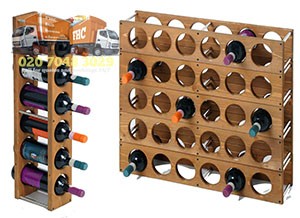
Wine racks are classy and instantly add a more sophisticated touch to any kitchen and living room. However you don’t have the break bank in order to purchase a nice wine rack as you can build one of your own at twice the price. If you have never build a wine rack before here is what you should do.
Start your building project by buying a sheet of wood. Opt for hardwood such as oak, maple or walnut as hardwood is extremely resilient and durable and will last for a long time. Next decide the size of your wine rack and the wooden sheet into the appropriate pieces (two rectangular and two square pieces). If you don’t have a table saw or circular saw you can ask the store’s clerk to cut the wooden sheet into the pieces that you desire.
Now grab one of the rectangular wooden pieces and start drawing circles on it. Draw the first circle at about two centimeters from the edge of the wooden piece and make sure that there is at least three centimeters between each circle. The circles should be about ten centimeters in diameters as this is the common diameter of a wine bottle.
Next hollow out the circles by using a scroll saw, if you don’t have a scroll saw you can either head back to the store and ask them to cut out the holes for you, or you can use a hand saw, but know that the latter approach will be quite time consuming, laborious and not as precise as cutting the holes with a scroll saw.
 Now draw two pensile lines across the rectangular wooden piece, the distance between the two lines should be no more than three centimeters. Then use a hand saw to cut the wooden piece along the pensile lines. Once you are done with this piece, do absolutely the same thing with the other rectangular piece. Make sure that you use the same measurements as both pieces must be identical in terms of dimensions.
The time has come to take care of the square pieces of wood. Grab one of the pieces and smooth its edges with sandpaper. If you have an electric sander even better as the job will get done more quickly. Once you have smoothened the edges of both square pieces, drill four screw holes in each square piece. With the aid of screws affix the wooden pieces with the half circles to the square pieces and voila your wine rack is ready. Now the only thing that you have to do, it to paint it in a color of your choosing.
Don’t bother clearing the created rubbish on your own. Instead call in a professional junk removal company to take care of the rubbish for you. By using junk removal services you will have the peace of mind that all the waste will be removed from your property quickly, smoothly and efficiently.
When the waste has been cleared, head to a local wine boutique and purchase several bottles of good wine to display on your newly homemade wine rack.


